Showing posts with label step-by-step. Show all posts

Friday, March 27, 2009

Daring Bakers March- Lasagna!

Good news. We've moved! Alex and I, not the website. We are still unpacking and assembling, which I think we will be doing for quite a while, but we're HERE. The old house still needs a little love, but we have until Tuesday to get it done. I do have the kitchen unpacked, which I guess is all that really matters.

And for the first post in the new house, this month's Daring Baker's Challenge! This month we made lasagna, which was awesome. I made every part from scratch. The noodles, the ragu, the bechemel, the ricotta (see my post on March 13), everything except the mozzarella and Parmesan. And while the whole process took about six hours, it was really, really good. I served this for dinner to some friends, and everyone ate a hefty slice, and then went back for seconds.

The March 2009 challenge is hosted by Mary of Beans and Caviar, Melinda of Melbourne Larder and Enza of Io Da Grande. They have chosen Lasagne of Emilia-Romagna from The Splendid Table by Lynne Rossetto Kasper as the challenge.

Gluten Free Egg Pasta

The choice of the first flour is personal. The original recipe called for corn flour because the subtle taste blended well with the dish. However, this is a matter of personal taste – please feel free to substitute a different flour for the corn flour but don't substitute a starch. I used rice flour and thought that was delicious.

1 c rice flour (or other flour of your choice)
3/4 c corn starch
scant 1 c tapioca starch
1 c potato starch
3/4 c sweet rice flour
1 1/2 t xanthan gum
1 t salt
6 eggs
3/8 cup of water
3 T olive oil

Sift all the dry ingredients together in a large bowl. Make a well in the middle of the dry ingredients.

Whisk together 3 eggs, the water and the oil. Pour into the middle of the dry ingredients. Mix with a sturdy wooden spoon, gradually drawing more of the flour mix into the wet ingredients. Add each egg as needed. The dough will be crumbly at the beginning but will gradually come together as you add the eggs. You will need to use your hands to squeeze and mix the dough.

The dough will be firm and stick together when ready. It will not have the elasticity of gluten dough therefore it will crack when kneaded and pushed. Form it into a smooth ball, oil it lightly, and cover securely with plastic wrap. Let it rest for an hour.

Put a sheet of plastic wrap on your work surface. This is very important as the dough will not hold together very well when lifted. Have flour ready for dusting (I used rice flour) and dust the surface lightly. Cut a piece of dough about the size of really large egg – it doesn’t matter the size but start small for the first one to gauge how much space you need. Keep the remaining dough covered so it does not dry.

Roll the dough into a ball and flatten into a disc with your hands. Put it on your work surface and flatten with your hands. Use a rolling pin and gently push the dough down and out ward from the center. You may have to place one hand on the plastic wrap as you push the dough down and away. Gluten free dough does not stretch like wheat dough therefore it needs gentle flattening and pushing. If it breaks, pat it back together. If it is too dry, dab a little water with your finger. The gluten free dough will be thicker than wheat dough and you will barely be able to see your hand through the dough. Once it is flattened, cut into strips or squares that will fit your pan. Alternately, use a pasta roller, which I did.

Set the dough aside on the plastic sheet. There is no need to dry the dough. But if you do dry the dough, it will not be able to hang because it will break. Stack the rolled out dough with plastic sheets in between.

Stack the sheets when dry and wrap securely. Store in the fridge until ready to use. Freezing will make the dough crumbly and difficult to work with – so freeze only as a last resort!This dough does not need to be precooked before being assembled into the lasagne.

Cheese bechamel

4 T unsalted butter
4 T rice flour (or sorghum flour, if using that use 3 T)
2 2/3 c milk
Salt and freshly ground pepper to taste
1 t paprika
1 c grated cheese (I used mozzarella)

Using a medium-sized saucepan, melt the butter over low to medium heat. Sift over the flour, whisk until smooth, and then stir (without stopping) for 1 minute. Whisk in the milk a little at a time and keep the mixture smooth. Bring to a slow simmer, and stir 3 to 4 minutes, or until the sauce thickens. Cook, stirring, for about 5 minutes, until the sauce thickens. Remove from heat, season with salt, pepper, and paprika, then stir in cheese.

My Version of Country Style Ragu’ (Ragu alla Contadina)


3 tablespoons extra virgin olive oil
1 medium onion, minced

1 carrot, minced
6 cloves garlic
1 lb ground beef

1 lb sausage (I used a mix of sweet and hot)
1 to 1 1/2 lb (total) cubed beef, pork and veal (often sold together in a 'gravy pack')
2 t paprika
1 t thyme
1 c red wine
1 1/2 c chicken or beef stock
2 cups milk
1 can tomatoes, diced

Salt and freshly ground black pepper to taste

Working Ahead:
The ragu can be made 3 days ahead. Cover and refrigerate. It also freezes well for up to 1 month. Skim the fat from the ragu’ before using it.

Browning the Ragu Base:
Heat the olive oil in a deep pot over medium-high heat. Add the onion, garlic, and carrot and sauté, stirring frequently with a wooden spoon, 10 minutes,
or until the onions barely begin to color. Add meat to the pan, sprinkle with paprika and thyme, and slowly brown over medium heat (do this in two batches if necessary). First the meats will give off a liquid and turn dull gray but, as the liquid evaporates, browning will begin. Stir often, scooping under the meats with the wooden spatula. Protect the brown glaze forming on the bottom of the pan by turning the heat down. Cook 15 minutes, or until the meats are a deep brown. Turn the contents of the skillet into a strainer and shake out the fat.

Add meats back to the pot, then add the wine, lowering the heat so the sauce bubbles quietly. Stir occasionally until the wine has reduced by half, about 3 minutes. Scrape up the brown glaze as the wine bubbles. Stir ½ cup stock into the saucepan and let it bubble slowly, 10 minutes, or until totally evaporated. Repeat with another ½ cup stock. Stir in the last 1/2 cup stock along with the milk. Adjust heat so the liquid bubbles very slowly. Partially cover the pot, and cook 1 hour. Stir frequently to check for sticking.

Add the tomatoes, and cook uncovered, at a very slow bubble for another 45 minutes, or until the sauce resembles a thick, meaty stew. Season with salt and pepper.

Assemble the Lasagna


1. Lightly grease your lasagna pan. Then pour 3 T water or stock in the bottom of the pan.
2. Spread a thin layer of ragu on the bottom of the pan.
3. Place a layer of lasagna noodles (uncooked!) on the ragu.
4. Top with cheese sauce, more ragu, then a good sprinkling of Parmesan and mozzarella cheese.
5. Add another layer of pasta, then repeat. I had six or seven layers. Keep going until you run out of everything. Cover with a final layer of ragu and cheese.
6. Pour a tablespoon of water or stock down the each of the corners of the pan. Cover tightly with foil, and bake 45 minutes at 350.
7. Remove the foil and bake another 15, until starting to brown just a little. Let rest 15 minutes before you try to cut and serve it (longer is better).

Saturday, February 28, 2009

Daring Bakers' Feb challenge! Flourless chocolate cake and ice cream


This months Daring Bakers challenge was a flourless chocolate cake, paired with our choice of ice cream. The cake recipe only had three ingredients. Butter, chocolate, and eggs. Easy peasy. I kicked mine up a bit with the addition of some coffee, which worked well with the ice cream I made. Last month when I was in NYC with my sister, we stopped in some place that had cardamom coffee. It was delicious, sweetened probably with condensed milk and tasted a lot like chai, but it was coffee. I've been thinking about it a lot. I decided on coffee ice cream immediately after reading what the challenge was, but didn't decide on cardamom coffee until later. I stumbled upon David Lebovitz's (who else)
recipe for Vietnamese coffee ice cream, and it was decided. 

I would make coffee cardamom ice cream, with a vanilla bean thrown in for good measure, and I would use regular milk (2%) and condensed milk instead of cups upon cups of cream, like in the ice cream recipes I've made in the past. I was all cocky and confident starting out, and then my ice cream maker quit working halfway through (it just doens't freeze enough to turn the cold liquid ice cream into churney delicious ice cream), so I finished by hand. Don't have an ice cream maker? Check out David Lebovitz's method here. I topped the whole thing with caramel sauce, and ooooooh yum. I wouldn't recommend eating the cake (with added coffee) or the ice cream anytime before bed, they both pack a punch of caffeine. 

This cake is cool because if you eat it cold, it is dense and like a truffle, but if you heat it up a bit it gets light and almost spongey. I plop a bit of caramel sauce (recipe below) on top and heat it up until the caramel melts. 

The February 2009 challenge is hosted by Wendy of WMPE's blog and Dharm of Dad ~ Baker & Chef.
We have chosen a Chocolate Valentino cake by Chef Wan; a Vanilla Ice Cream recipe from Dharm and a Vanilla Ice Cream recipe from Wendy as the challenge.  I'm not posting the vanilla ice cream recipes because I didn't make them, check out the hosts blogs or any of the many other participants blogs
here. 

February’s challenge is a Flourless Chocolate Cake, Chocolate Valentino, inspired by Malaysia’s “most flamboyant food ambassador”, Chef Wan. Recipe comes from Sweet Treats by Chef Wan.

Chocolate Valentino
Preparation Time:  20 minutes
This recipe took me less than 20 minutes to put together. 
16 ounces (1 pound) (454 grams) of semisweet chocolate, roughly chopped
½ cup (1 stick) plus 2 tablespoons (146 grams total) of unsalted butter
(I only used 1 stick)
5 large eggs separated
My addition- 2 T finely ground coffee

1. Preheat oven to 375. Put chocolate and butter in a heatproof bowl and set over a pan of simmering water (the bottom of the bowl should not touch the water) and melt, stirring often. I melted mine in the microwave, stirring ever 20 seconds until smooth. Stir in the coffee at this point if using. 
2. While your chocolate butter mixture is cooling. Butter your pan (I used 8" round) and line with a parchment circle then butter the parchment.3. Separate the egg yolks from the egg whites and put into two medium/large bowls.
4. Whip the egg whites in a medium/large grease free bowl until stiff peaks are formed (do not over-whip or the cake will be dry). 
5. With the same beater beat the egg yolks together.
I just whisked mine briskly for a minute or two with a fork.
6. Add the egg yolks to the cooled chocolate.
7. Fold in 1/3 of the egg whites into the chocolate mixture and follow with remaining 2/3rds. Fold until no white remains without deflating the batter. 
8. Pour batter into prepared pan, the batter should fill the pan 3/4 of the way full, and bake at 375F/190C
9. Bake for 25 minutes until an instant read thermometer reads 140F/60C. 
Note – If you do not have an instant read thermometer, the top of the cake will look similar to a brownie and a cake tester will appear wet. I baked mine until it stopped being jiggley. 
10. Cool cake on a rack for 10 minutes then unmold.
My cake fell a bit, but was still fine. 


Cardamom coffee ice cream

1 1/2 c water
a generous 1/2 c dark roast coffee plus 1 T
6 whole cardamom pods, smashed a bit
1 vanilla bean, cut in half
1 can condensed milk
1 t ground cardamom
1/3 c milk (I used 2%)

Bring water to a boil, then add 1/2 c coffee, cardamom pods, and vanilla bean. Cover and remove from heat, let steep at least 10 minutes. Strain through a fine sieve or coffee filter, and scrape the vanilla beans into the coffee. You'll need 1 cup coffee. Whisk together condensed milk, ground cardamom, milk and coffee. Chill until very cold, then churn in your ice cream maker or freeze by David Lebovitz's directions, as I did. 

Caramel Sauce 

1 c sugar
6 T butter
1/2 c cream
optional 1 t vanilla

Heat the sugar in a medium saucepan until melted, stirring often. Once the sugar comes to a boil, stop stirring and just occasionally swirl the pan. Continue cooking until sugar is a fairly dark amber, then add the butter. Whisk until butter is melted, then turn off the heat. Add the cream (careful! it will bubble up!) and optional 1 t of vanilla and whisk until smooth, then pour into a Mason jar that you have run under hot water for a minute to heat up. Sauce will thicken when kept in the fridge, just heat up a bit before use. 


Wednesday, December 3, 2008

"Things I find in the refrigerator" soup

As I've said before, Alex loves it when I make soup. The other night when it was raining and crappy and miserable out, I made soup to go with the sweet corn pudding I made. When I make soup, I follow this process, instead of following recipes, because usually when I make soup I make it with a tub of stock fron the freezer plus things I find in the fridge, like leftover meat, veggies that needed to be eaten yesterday, and other stuff I find. Things-from-the-fridge soup always turns out delicious, and often can be a whole meal - you have plenty of veggies, a meat, and often a starch, maybe even some dairy. 
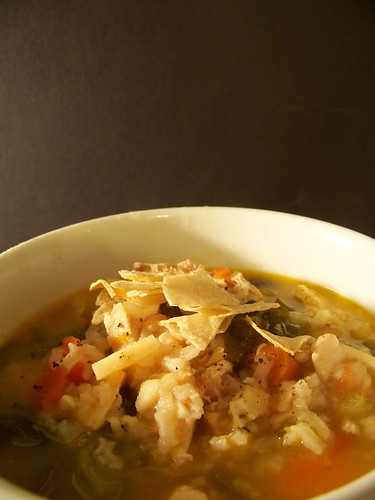
Things from the fridge soup
This is not a recipe but a process. Use whatever you have left in your fridge!

1. First things first. If you are using frozen stock, microwave it or thaw it in a pan on the stove. 
2. Chop all your vegetables. I always use onion and garlic, this time I added carrots, celery, a parsnip, and Chinese broccoli. If your vegetables have leafy greens, like bok choy or Chinese broccoli, slice the stems and use them now. Set aside the leafy greens to be added in at the end. 
3. If you are using raw meat, cook it now, then remove from the pan and set aside. 
4. Heat a bit of butter or olive oil in your soup pot. Add your chopped veggies, and cook 5-10 minutes until softened and starting to brown. I know all these vegetables cook for different amounts of time, but they're going to keep cooking in the soup so it will be ok. 
5. Once vegetables are soft, add tomato if you are using tomatoes. 
6. Add some salt and pepper, and if you want to add some spices do it now. I often use cumin and coriander, or curry powder, and paprika and chili powder if you want a kick. Cook the spices for a minute, stirring. 
7. Add the stock (and some water if it's strong, or if you don't have a lot of stock) and stir to get anything stuck on the bottom of the pan into the liquid. Bring to a simmer. 
8. Add whatever starch you are using (unless you're using pasta). I usually use rice, but buckwheat is great, and quinoa is too. Simmer, stirring, for 15 minutes. 
9. Add cooked meat back to the pot. If using pasta, add it now. Cook about 5 minutes, until meat is hot and has taken in some of the soup juices. (You can add the meat earlier, of course, and let it cook further with the vegetables.) If you're using tofu instead of meat, add it now. 
10. Dump in all your greens, if using. Cook just until wilted. 
11. At this point, you are done. However, there are other optional things you can do, like crack in some eggs, stir in some cream or cheese or yogurt, add a sliced avocado and some tortilla chips, or stir in some miso (make sure it's gf!). 

Wednesday, October 29, 2008

Daring Bakers October Challenge: Pizza!!

I finally joined the Daring Bakers! And what a perfect first challenge. I love pizza (did you know I have a pizza slice with wings tattooed on my hip?) as you may or may not know. Pizza is one of my favorite foods. I already have a stand-by gluten-free pizza recipe, but gave this months recipe a shot. I'm glad I did. It's vegan, first of all, and second, it doesn't need any ingredients that I don't normally have around the house. 
Flour mix, water, salt, sugar, yeast, olive oil. I made the recipe three times. Once in Milwaukee, where I made the recipe just as it said, and ended up with six small (personal sized) pizzas. They were good, and fed three gluten-eaters, but the consensus was that we should bake the crusts before topping them, just enough to firm them up a bit. Otherwise the dough just tasted a bit raw. When I made pizza at home, with/for Alex, I decided to do something different than plain pizzas with pepperoni and mushrooms or whatever. On the train on the way back from Milwaukee, I read most of Jane and Michael Stern's Two for the Road, which I liked a lot. There was a recipe for fresh clam pizza, from Frank Pepe's in New Haven. 

My parents both grew up in Connecticut, and both sets of my grandparents live(d) there. My dad took us a few times to the New Haven legendary pizza places, Sal and Pepe's. The two restaurants are a block apart, on the same street. I haven't been back in years and years, but was so interested in recreating the thin-crust, garlicky clam pizza for Alex. I'm so glad I did, it was awesome. We had it two nights in a row it was so good. 
 BASIC PIZZA DOUGH 
Here is the GF version of the recipe, which I don't think made much difference whether it was made in 1 or 2 days. 
Original recipe taken from “The Bread Baker’s Apprentice” by Peter Reinhart
.
Makes 6 small or 3-4 large pizzas
Ingredients: 
4 1/2 c rice flour mix
2 t xanthan gum
1 3/4 t Salt
2 t instant yeast
1/4 c olive oil
1 3/4 c ice water
1 T sugar 
cornmeal for dusting
DAY ONE
Method: 1. Mix together the flour, salt and instant yeast in a big bowl (or in the bowl of your stand mixer).
2.
 Add the oil, sugar or agave syrup and cold water, then mix well (with the help of a large wooden spoon or with the paddle attachment, on low speed) in order to form a sticky ball of dough. I added in extra rice flour to make it a more managable dough. 3. Flour a work surface or counter with rice flour.  Line a jelly pan with baking paper/parchment. Lightly oil the paper.4. With the help of a metal or plastic dough scraper, cut the dough into 6 equal pieces (or larger if you want to make larger pizzas).
NOTE: 
To avoid the dough from sticking to the scraper, dip the scraper into water between cuts.
5. Sprinkle some rice flour over the dough. Make sure your hands are dry and then flour them.  Gently round each piece into a ball.NOTE: 
If the dough sticks to your hands, then dip your hands into the rice flour again.
6. Transfer the dough balls to the lined jelly pan and mist them generously with spray oil. Slip the pan into plastic bag or enclose in plastic food wrap. (I just wrapped each dough ball in plastic wrap.)
7. Put the pan into the refrigerator and let the dough rest overnight or for up to thee days.
NOTE: 
You can store the dough balls in a zippered freezer bag if you want to save some of the dough for any future baking. In that case, pour some oil(a few Tbs only) in a medium bowl and dip each dough ball into the oil, so that it is completely covered in oil. Then put each ball into a separate bag. Store the bags in the freezer for no longer than 3 months. The day before you plan to make pizza, remember to transfer the dough balls from the freezer to the refrigerator.
DAY TWO
NOTE: If you want to make the dough in one day, just let the dough rest about an hour. Not in the fridge. 

8.  
On the day you plan to eat pizza, exactly 2 hours before you make it, remove the number of desired dough balls from the refrigerator.  Place on a sheet of parchment paper and sprinkle with a gluten free flour. Delicately press the dough into disks about ½ inch thick and 5 inches in diameter. Sprinkle the dough with rice flour, mist it again with spray oil. Lightly cover the dough round with a sheet of parchment paper and allow to rest for 2 hours.
9. At least 45 minutes before making the pizza, place a baking stone on the lower third of the oven.  Preheat the oven as hot as possible (500° F/260° C). NOTE: 
If you do not have a baking stone, then use the back of a jelly pan. Do not preheat the pan.
10. 
 Press the dough into the shape you want (about 9-12 inches  in diameter - for a 6 ounces  of dough).
NOTE: 
Make only one pizza at a time.

I suggest baking the pizza before topping! Bake at this point between 5-10 minutes, until if you press down on the crust it no longer feels like it can be reshaped. 

11. Lightly top it with sweet or savory toppings of your choice.
12.
 Place the garnished pizza on the parchment paper onto the stone in the oven or bake directly on the jelly pan. Close the door and bake for about 5-8 minutes. (I had to bake mine longer, about 10-15)
NOTE: 
Remember that the best pizzas are topped not too generously. No more than 3 or 4 toppings (including sauce and cheese) are sufficient.
13. Slide the garnished pizza onto the stone in the oven or bake directly on the jelly pan. Close the door and bake for about 
5-8 minutes.
NOTE: 
After 2 minutes baking, take a peek. For an even baking, rotate 180°.If the top gets done before the bottom, you will need to move the stone or jelly pane to a lower shelf before the next round. On the contrary, if the bottom crisps before the cheese caramelizes, then you will need to raise the stone or jelly.14. Take the pizza out of the oven and transfer it to a cutting board or your plate. In order to allow the cheese to set a little, wait 3-5 minutes before slicing or serving. 
New Haven Clam Pizza
1 pizzasworth of dough
1/2 head of garlic
3 T olive oil
2 T Parmesan cheese
a dozen just shucked littleneck clams, and some of their juice
1 t oregano

Mince the garlic and let steep in the olive oil for 10-15 minutes. Spread over the pizza crusts, then sprinkle with the clams and juice. Sprinkle the cheese and oregano over, bake for 10-15 minutes, and eat. You will probably repeat. 

I also made pizzas with tomato sauce, mozzerella, spinach (under the cheese), mushrooms, onions, bacon, and pepperoni. That was also delicious. I love pizza!!

Thursday, March 6, 2008

Step-by-Step Guide to Making Chicken Kiev

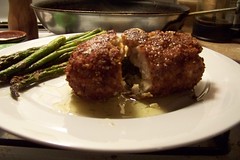
I got the March Saveur recently and it's theme is butter. They had a recipe for chicken Kiev that looked stunning. This is how I made it. I baked it after quickly frying it because I was afraid the butter would ooze out after 25 minutes of frying, and also because gf breadcrumbs brown much faster than regular ones and I didn't want burned-crust Kiev.

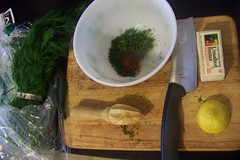
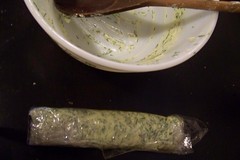
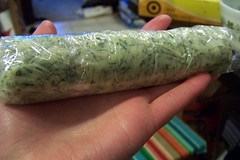
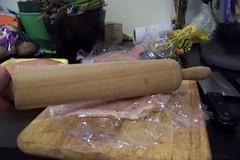
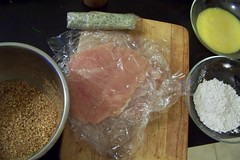
Step 1: Make lemon-dill butter. Mash up a stick of good butter (room temperature) with the juice of 1/2 lemon (or less), a good handful of dill, finely chopped, salt and pepper and a big pinch of cayenne. Step 2: Form the butter into a log shape, and wrap in plastic wrap.Step 3: Refrigerate the butter log for 2 hours, or stick in the freezer for about 1/2 an hour. Step 4: While the butter is chilling, pound flat your chicken breasts between 2 pieces of plastic wrap. Use a mallet if you have it, or a rolling pin of heavy pan. Step 5: Assemble your ingredients. Cut the butter into 4 equal sized pieces, put 1 c rice flour into a bowl, beat 2 eggs in a seperate bowl, and mix salt and pepper and some dried thyme in a bowl with about 2 c breadcrumbs (I toast then process in the food processor gf bread from the grocery store, since I don't like eating it). Have ready a large plate to put your finished chicken onto.
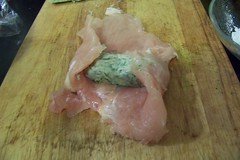
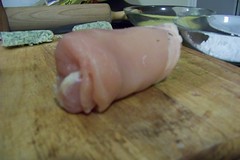
Step 6: Roll the chicken securely around the butter logs. You can flatten or reshape them as necessary. Fold the ends over, then roll, making sure it will securely hold the butter. Step 7: Dredge the rolled pieces carefully in the flour, then the egg, then the crumbs. Press the crumbs into the chicken and then gently shake off excess. Place on empty plate, then repeat.

Step 8: Chill for 2 hours.
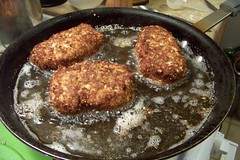
Step 9: Fry chicken, carefully sliding into the oil, sealed side down. Preheat the oven to 350. Turn chicken when well browned, carefully, so you don't squeeze out the butter. Transfer to a pan, and bake for about 20 minutes. Serve immediately.